
Expert Guide to Installing and Maintaining Cedar Cladding | Tips & Techniques
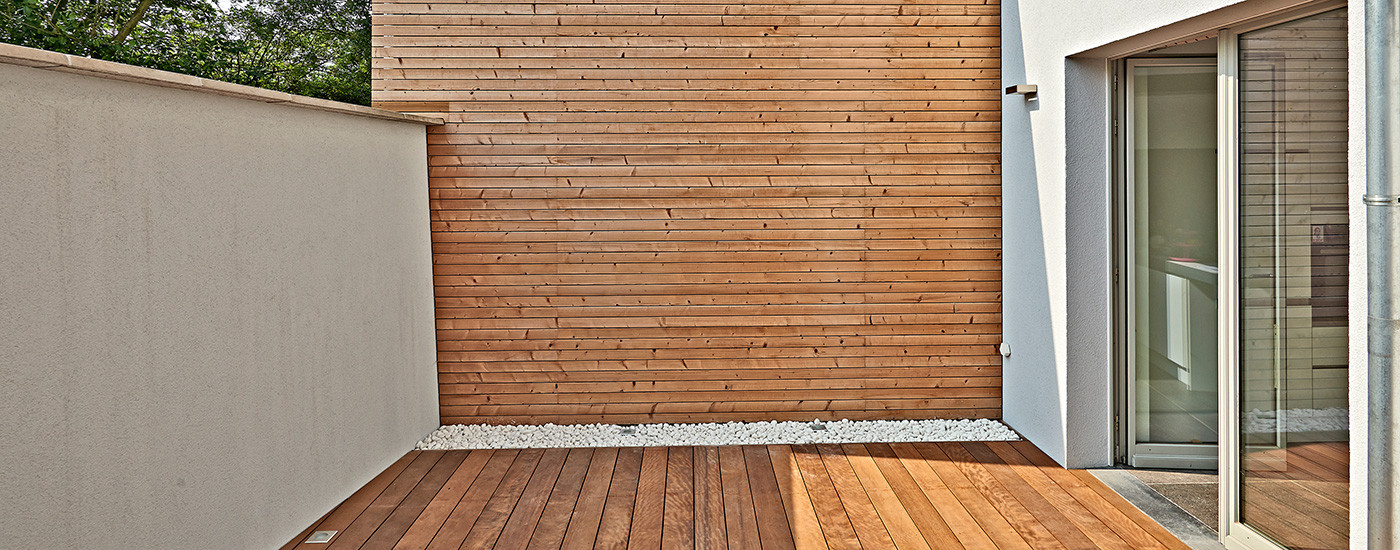
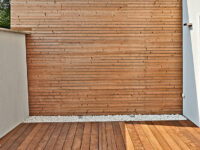
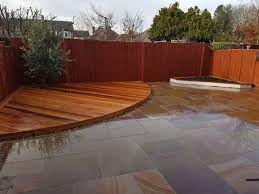
Cedar cladding is a popular choice for homeowners seeking both durability and aesthetic appeal for their properties. Its natural beauty, resistance to decay, and ability to withstand harsh weather conditions make it an ideal option for exterior siding. However, proper installation and maintenance are crucial to preserve its longevity and charm.
Table of Contents
- Preparing for Installation
- Installing Cedar Cladding
- Maintaining Cedar Cladding
- Check out Some of the Best Cladding Products Here
- Conclusion
- FAQs
- What are the benefits of using cedar cladding for exterior siding?
- How should I prepare the surface before installing cedar cladding?
- What type of fasteners should I use for cedar cladding installation?
- How should cedar cladding be installed?
- What finishing options are available for cedar cladding?
- How often should cedar cladding be inspected and cleaned?
- When is refinishing cedar cladding necessary?
- Can cedar cladding be painted?
- How can I prevent the discoloration of cedar cladding?
- Is cedar cladding suitable for all climates?
Preparing for Installation
Selecting the Right Cedar
Before diving into the installation process, it’s essential to choose the right type of cedar for your cladding project. Western Red Cedar is often preferred due to its natural resistance to decay and insects, as well as its stunning reddish-brown color. Ensure that the cedar you select is kiln-dried and free of defects to prevent issues down the line.
Preparing the Surface
Proper preparation of the surface is key to a successful installation. Begin by inspecting the substrate for any signs of damage or moisture. Repair any defects and ensure the surface is clean and dry before proceeding. Installing a weather-resistant barrier, such as house wrap, can also help protect the underlying structure from moisture infiltration.
Installing Cedar Cladding
Choosing the Right Fasteners
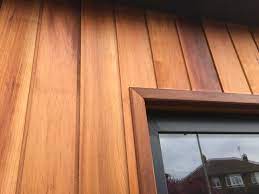
When it comes to fastening cedar cladding, stainless steel nails or screws are the preferred choice. These fasteners are durable and resistant to corrosion, ensuring a secure installation that will withstand the test of time. Be sure to use the appropriate length and gauge of fasteners to accommodate the thickness of the cedar boards.
Proper Installation Techniques
Start by laying the first course of cedar boards at the bottom of the wall, ensuring that they are level and properly aligned. Use a spirit level to check for accuracy and adjust as necessary. Install subsequent courses, staggering the joints for added strength and visual appeal. Leave a small gap between boards to allow for natural expansion and contraction due to changes in temperature and humidity.
Finishing Touches
Once the cedar cladding is installed, apply a high-quality finish to protect it from the elements and enhance its natural beauty. Semi-transparent stains and clear sealers are popular choices, as they allow the wood’s grain to show through while providing adequate protection against UV rays and moisture.
Maintaining Cedar Cladding
Regular Inspections
To ensure that your cedar cladding remains in top condition, perform regular inspections to check for any signs of damage or wear. Look for cracks, splits, or areas of discoloration, as these may indicate underlying issues that need to be addressed.
Cleaning
Periodic cleaning is essential to remove dirt, grime, and mildew that can accumulate on the surface of cedar cladding over time. Use a mild detergent and water solution, along with a soft-bristle brush or sponge, to gently scrub the wood’s surface. Avoid using high-pressure washers, as these can damage the wood fibers and lead to premature deterioration.
Refinishing
Over time, the finish on cedar cladding will naturally wear away due to exposure to the elements. When this occurs, it’s important to refinish the wood to restore its protective properties and enhance its appearance. Begin by thoroughly cleaning the surface, then apply a fresh coat of stain or sealer according to the manufacturer’s instructions.
Check out Some of the Best Cladding Products Here
Western Red Cedar 45x45mm L Section
Certification
Stocks are PEFC (Programme for the Endorsement of Forest Certification schemes) certified which is a chain of custody system that proves the legality and sustainability of the timber.
Grading
this item is no.2 clear & better allowing 15% no.4
no.2 grade allows
- three irregularities on face side per 12ft lengths
- four irregularities on the reverse face per 12ft length
- knots up to ½” on face
- knots up to ¾” on the reverse face
- 15% of no.2 grade may contain four irregularities on the face and soft knots
no.4 grade allows
- Four irregularities on the face side per 12ft length
- Characteristics on the reverse are slightly more than those allowed on the face
- knots: four up to 1” or equivalent eg four 1” or one 4”
- resin pockets, splits, checks, warp, wane and wormholes are permitted to some degree.
Lengths
The lengths we have available are listed in the drop-down box to the right and can be selected and ordered online.
Moisture Content
Supplied ‘Green’ wet, we recommend drying the timber before installation, if you are using the cedar internally then it will need to be acclimatized for at least a week inside before installation. Cedar dries rapidly once the boards are separated from the pack, they will need warmth and air circulation to dry effectively. Boards should be stacked flat and evenly supported during drying.
Specie
Western Red Cedar is sourced from the Pacific Northwest from Northern California to Alaska. This species is classed as a Softwood but has very good durability due to a natural oil in it making it perfect for exterior applications. The timber machines well are stable and easy to work with.
Colour
Ranges from light golden color to mid to dark brown, some boards have a slight tint of red
Fixings
Stainless steel nails must be used on Western Red Cedar to stop staining. Use of regular nails will over time result in black streaks running down the timber caused by the iron in the nail reacting with chemicals in the cedar.
Key Features
- Fashionable, beautiful timber
- Naturally very long-lasting
- Easy to work with
- Stainless steel fixings must be used
- We recommend ‘OSMO 420 oil’ to maintain colour & enhance the beauty
- Overlap external corner profile
- Full range of lengths in stock see the ‘Board Length’ tab below
Western Red Cedar 20 x 145mm P.A.R.
Certification
Stocks are PEFC (Programme for the Endorsement of Forest Certification schemes) certified which is a chain of custody system that proves the legality and sustainability of the timber.
Grading
this item is no.2 clear & better allowing 15% no.4
no.2 grade allows
- three irregularities on the face side per 12ft lengths
- four irregularities on the reverse face per 12ft length
- knots up to ½” on the face
- knots up to ¾” on the reverse face
- 15% of no.2 grade may contain four irregularities on the face and soft knots
no.4 grade allows
- Four irregularities on the face side per 12ft length
- Characteristics on the reverse are slightly more than those allowed on the face
- knots: four up to 1” or equivalent eg four 1” or one 4”
- resin pockets, splits, checks, warp, wane, and wormholes are permitted to some degree.
Lengths
The lengths we have available are listed in the drop-down box to the right and can be selected and ordered online.
Moisture Content
Supplied ‘Green’ wet, we recommend drying the timber before installation, if you are using the cedar internally then it will need to be acclimatized for at least a week inside before installation. Cedar dries rapidly once the boards are separated from the pack, they will need warmth and air circulation to dry effectively. Boards should be stacked flat and evenly supported during drying.
Specie
Western Red Cedar is sourced from the Pacific Northwest from Northern California to Alaska. This species is classed as a Softwood but has very good durability due to a natural oil in it making it perfect for exterior applications. The timber machines well are stable and easy to work with.
Colour
Ranges from a light golden colour to mid to dark brown, some boards have a slight tint of red
Fixings
Stainless steel nails must be used on Western Red Cedar to stop staining. Use of regular nails will over time result in black streaks running down the timber caused by the iron in the nail reacting with chemicals in the cedar.
Key Features
- Fashionable, beautiful timber
- Naturally very long-lasting
- Easy to work with
- Stainless steel fixings must be used
- We recommend ‘OSMO 420 UV protection oil’ to maintain color & enhance the beauty
Conclusion
Proper installation and maintenance are essential for ensuring the longevity and beauty of cedar cladding. By following the guidelines outlined in this article, you can enjoy the timeless elegance of cedar while protecting your home from the elements.
FAQs
What are the benefits of using cedar cladding for exterior siding?
Cedar cladding offers several advantages, including natural beauty, durability, resistance to decay and insects, and the ability to withstand harsh weather conditions.
How should I prepare the surface before installing cedar cladding?
Before installation, it’s crucial to inspect the substrate for any damage or moisture and repair as needed. Ensure the surface is clean and dry, and consider applying a weather-resistant barrier like house wrap for added protection.
What type of fasteners should I use for cedar cladding installation?
Stainless steel nails or screws are recommended for fastening cedar cladding due to their durability and resistance to corrosion. Be sure to use the appropriate length and gauge of fasteners for optimal performance.
How should cedar cladding be installed?
Start by laying the first course of cedar boards at the bottom of the wall, ensuring they are level and properly aligned. Install subsequent courses, staggering the joints and leaving a small gap between boards for natural expansion and contraction.
What finishing options are available for cedar cladding?
Popular finishing options for cedar cladding include semi-transparent stains and clear sealers, which enhance the wood’s natural beauty while protecting against UV rays and moisture.
How often should cedar cladding be inspected and cleaned?
It’s recommended to perform regular inspections of cedar cladding to check for signs of damage or wear. Periodic cleaning should also be conducted to remove dirt, grime, and mildew, ideally once or twice a year.
When is refinishing cedar cladding necessary?
Cedar cladding may need to be refinished when the existing finish begins to wear away, typically every few years depending on exposure to the elements. Refinishing helps restore the wood’s protective properties and enhance its appearance.
Can cedar cladding be painted?
While cedar cladding is often left unfinished to showcase its natural beauty, it can be painted if desired. However, it’s essential to use a high-quality exterior paint specifically formulated for wood surfaces and follow proper preparation and application techniques.
How can I prevent the discoloration of cedar cladding?
To prevent discoloration, avoid using harsh chemicals or cleaners that can damage the wood’s surface. Additionally, applying a UV-resistant finish can help protect cedar cladding from fading due to sun exposure.
Is cedar cladding suitable for all climates?
Cedar cladding is well-suited for many climates, thanks to its natural resistance to decay and insects. However, proper installation and maintenance are essential to ensure optimal performance and longevity in any environment.